Thermal Camera Tips to Avoid Common Home Inspection Mistakes
Thermal cameras are amazing tools with the power to reveal hidden problems that other technologies can’t detect, such as water leaks, heat/cold infiltration, and pests. But understanding what you’re looking at with thermal imaging isn’t always easy, even for those with subject matter expertise in building inspection, HVAC, or electrical systems. If you have purchased a thermal camera or are thinking about adding thermal imaging to your inspection program, be sure to avoid these common mistakes.
#1 Mistake: Misinterpreting Images
While inspecting a home with a FLIR camera, you will find cold spots, hot spots, and patterns that might not make sense and are easy to misinterpret. Learning to correctly interpret thermal images and identify wet areas, air leaks, potential mold problems, water leaks, termites and other pest infestation, missing insulation, and other problems takes practice.
Tips:
- Not all cold or hot spots are problems. Be cautious before making a judgement - misdiagnosing a problem could induce costly destructive measures that prove you were wrong.
- Don’t make snap decisions on site. If you aren’t sure about something, particularly as you get started, take your imagery back to your office and get the image on a big screen before you make the final call and put something in a report.
- Don’t charge extra or advertise that you will include thermal imaging analysis in your reports until you feel confident. You will add value by including a few observations on the issues you are sure of.
- Invest in reporting software such as FLIR Thermal Studio, which offers editing, measurement, and analysis tools that can make your images easier to interpret.
- Educate yourself about interpreting thermal images before investigating using a thermal camera. An ITC certification is a good place to start, and there’s plenty of free online training available as well.

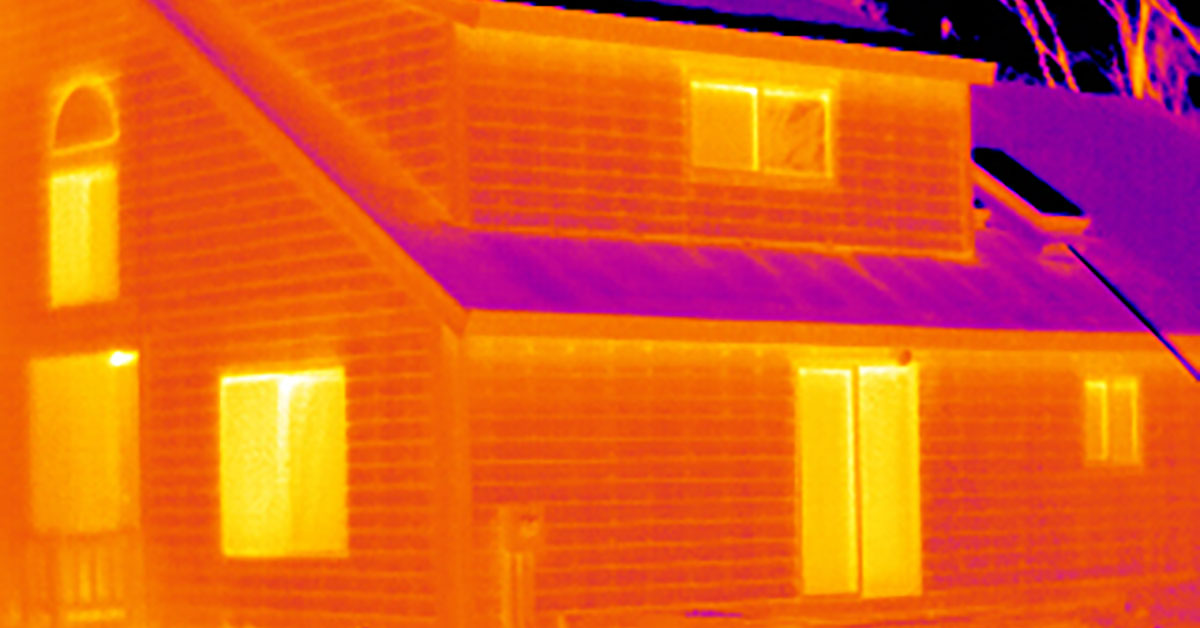
This looks like a pretty serious water leak from the roof or second floor of this house. Or is that cold air? Or is it a leaking HVAC vent?
#2 Mistake: Temperature Measurement Errors
It’s easy to make mistakes when it comes to getting an accurate temperature reading. FLIR products designed for home inspection are normally in the +/- 2% accuracy range, but certain materials (like shiny metal) can wildly influence the temperature your camera shows. Without an understanding of how emissivity, distance, and other factors affect your camera, you should not rely on your temperature measurements.
Tips:
- Gain a thorough understanding of how to adjust for emissivity if you need to take temperature measurements. The science of emissivity is explained in a Level I Thermography course.
- Be especially aware that the temperature of shiny objects, like polished metal, will not be accurately measured by your thermal imager due to their low emissivity. However, it is often possible to increase the emissivity of targets using relatively easy, cheap means.
- Know that cameras with a wide field of view are optimized for measuring objects that are close by. If you need to measure the temperature of a small target at a distance, consider a camera with a narrower FOV.
- Most electrical equipment under load will get hot, so just noticing a hot spot might not indicate a problem. Know what temperature the equipment you’re looking at should be when it’s functioning correctly.

Wow, this breaker looks hot. Is this a problem?
#3 Mistake: Know the Limitations of Your Tool
It would be great if the FLIR ONE Pro could satisfy all possible thermography needs. But while entry level cameras like the FLIR ONE and FLIR C3 are great tools, they do have their limits. As with most tools, you are limited by the technology itself as well as by what you know how to do with it. Expertise with a thermal camera takes time, and some applications may require a high-performance camera.
Tips:
- Be aware that entry-level cameras will detect about a 1.5°C difference in surface temperature on a painted wall (or other high emissivity surface). Expert cameras are accurate to as low as a 0.02°C difference.
- Certain applications, such as detecting moisture issues with thermal imaging, will require a higher-performance camera that can detect subtle temperature differences.
- If you can, try and buy a camera that will satisfy your need in the longer run. Starting with an entry-level camera will get you a long way, but if you know your applications will require a high-performance camera, you’ll save money by getting that camera from the start.
- If you’re unsure about a purchase, consider renting a higher-performance camera and evaluate if it suits your needs.

This image of termite infestation requires high sensitivity and resolution to detect, as only a slight temperature difference reveals the pests.
The best way to avoid making mistakes when diagnosing problems in a home is become a certified thermographer. The Infrared Training Center (ITC) offers courses that dig into the science of thermography, best practices when using a thermal camera, and how to correctly interpret images, as well as online resources and support.
Related Articles
-
 How To
How To Detect a Water Leak with Thermal Imaging
Learn more -
 Application Story
Defeating Pests at Hide-&-Seek with FLIR Thermal Imaging Cameras.
Read the Story -
 Tech Note
You Can’t Afford to Forget ‘FORD’ – 3 Things to Remember During an IR Inspection
Read the Story