Getting Started with NI Compact Vision System
Preparing for Use
Before you use your Point Grey camera, we recommend that you are aware of the following resources available from the Downloads page:
Getting Started Manual for the camera—provides information on installing components and software needed to run the camera.
Technical Reference for the camera—provides information on the camera’s specifications, features and operations, as well as imaging and acquisition controls.
Firmware updates—ensure you are using the most up-to-date firmware for the camera to take advantage of improvements and fixes.
Development Configurat
The NI CVS device comes with a primary GigE port as well as VGA port. During development phrase, you can connect your NI CVS device to your development PC's Gigabit Ethernet port. You compile your program on your development PC and deploy it to your CVS device. Once your program is finalized and deployed to the CVS device, you can connect a monitor to it (to view results) and disconnect it from the development PC.
NI Compact Vision System
|
USB3 Vision Compact Vision System NI CVS-1459RT |
 |
|
GigE Vision Compact Vision System NI CVS-1458RT |
 |
Specifications
| For NI CVS 1459RT USB3 Vision | |
| Camera | GS3-U3-23S6M |
| Resolution | 1920 x 1200 |
| Pixel Format | Raw8 |
| Frame Rate | 162 FPS |
| Firmware | 2.8.3.0 |
| For NI CVS 1458RT GigE Vision | |
| Camera | GS3-PGE-23S6C |
| Resolution | 1920 x 1200 |
| Pixel Format | Raw8 |
| Frame Rate | 30 FPS |
| Firmware | 1.6.3.0 |
| Development PC | |
| CPU | Intel i7 4770 @ 3.4 GHz |
| Motherboard | Asus Z87-Expert |
| Operating System | Windows7 x64 |
| USB 3.1 Adapter | On board Intel 8 series host controller |
| GigE Adapter | Point Grey 2-port POE interface card (GIGE-PCIE2-2P02) |
| RAM | 8 GB, 1333 MHz non-ECC memory |
| Hard Drive | 250 GB Samsung 840 EVO SSD |
Installation and Configuration
Step 1-Physical Setup
To setup NI CVS device:
Connect the primary network from the CVS device to your development PC.
 |
The primary network port on the NI CVS device is labeled with “ACT/LINK”. NI CVS devices are pre-configured to use DHCP or Link Local addressing. |

Example NI CVS Device Primary Network Configuration
Step 2-Install Software on Development PC
NI provides two options for developing machine vision applications:
- NI Vision Builder AI 2014
It is required to use Vision Builder AI 2014 or later. - NI Vision Development Module
For information on installing Vision Development Module, see page 5 on NI’s Getting Started Page for NI CVS 1459RT. The same installation step applies to NI CVS 1458RT.
Note that you need to install the following modules in the order specified in NI’s Getting Started Page for NI CVS 1459RT:
- LabVIEW
- LabVIEW Real-Time Module
- LabVIEW FPGA Module
- NI Vision Development Module
- NI-IMAQdx
- NI-IMAQ I/O
Step 3-Install Software on NI CVS Device
- Launch NI Vision Builder 2014 on your development PC to select the NI CVS device and click Install Software.
The NI CVS device’s primary network connection is set to DHCP by default. It waits for your DHCP server to assign an address before it shows up in Vision Builder AI 2014. If DHCP fails to assign an IP address to the camera, the connection falls back to link local addressing.

- Follow the installation steps and click OK when you are finished.
Step 4-Start Image Acquisition
Using Vision Builder AI 2014:
- Double click on the NI CVS device in Vision Builder AI.

- Connect your Point Grey GigE Vision or USB3 Vision camera to the NI CVS device.
- For GigE Vision cameras, wait for the camera to acquire an IP address.
- Open the sample GigE Vision Inspection called Acquire Image from GigE Vision Camera Example.
Note: Acquire Image from GigE Camera Example also works for USB3 cameras.
- Proceed to Step 5 for detailed instructions on how to acquire images in Vision Builder AI.
Using NI LabVIEW:
- Open LabVIEW 2014 and under Tools, select Real-Time Module→Project Wizard.

- Enter your project name and click Next.

- Customize your architecture options and click Next.

- Click Browse and select your target from one of the existing targets.

If you cannot find your NI-CVS, you can choose the option to specify a target or device by IP address.
- If you have a LabVIEW VI that has been tested on a development PC with a Point Grey camera, you can add the VI in Project Explorer.

- Proceed to Step 5 for detailed instructions on how to acquire images in LabVIEW.
Step 5-Acquire Images
You can see the acquired images on your NI CVS device by using one of the software choices below.
| |
After you have finished with development, you can disconnect the Ethernet connection between your development PC and the CVS device. The CVS device acts as a standalone system, you can connect a monitor to it and inspect your program output. |
To acquire images in Vision Builder AI 2014:
- In Vision Builder AI 2014, double-click on Acquire Image.

- Select your Point Grey camera and click OK.

- From the Operate menu, select Run Inspection in a Loop to grab images continuously.

To acquire images in LabVIEW:
- Open the LabVIEW project and start acquiring images using your VI.

| |
You can download Point Grey’s sample LabVIEW VI from Programming Point Grey Cameras in National Instruments (NI ) LabVIEW. Please note you can only use IMAQdx examples with NI’s CVS device. Point Grey’s ActiveX examples are not supported by the NI CVS device. |
To acquire images in NI-MAX:
You can quickly check if your camera can grab images on the CVS device, using NI-MAX on your development PC.
- Install NI MAX version 14 or higher on your development PC.
- In NI-MAX, under Remote Systems, browse to the Point Grey camera.
- Click Grab to start acquisition.

Troubleshooting
What if the connection is lost to the NI CVS 1458RT device?

You may see this error if your NI CVS device has an inconsistent IP setting.
To resolve:
- Disconnect the network connection between the development PC and the NI CVS device.
- Restart your DHCP server and make sure your DHCP server can assign a new IP address.
- Reconnect the network cable between the development PC and the NI CVS device.
Related Articles
-
 Application Story
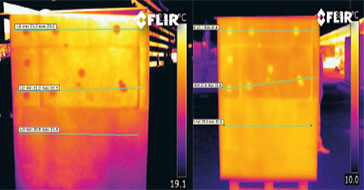
FLIR cameras support analysis and diagnosis of external thermal insulation systems
Read the Story -
 Case Study
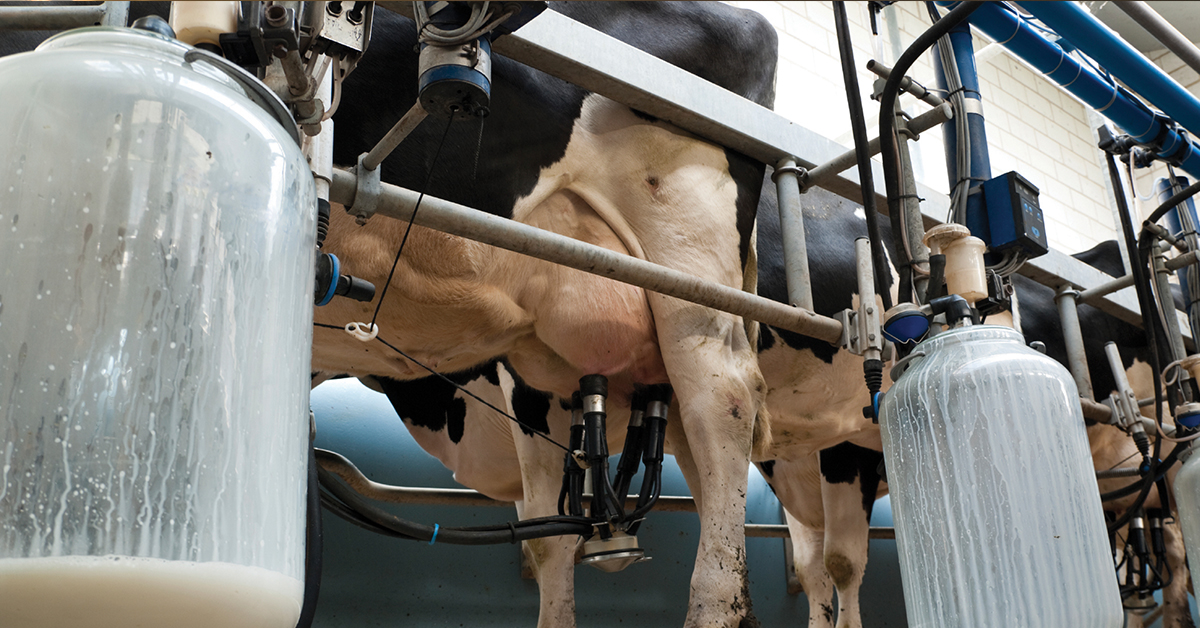
Automatic Health Check in Dairy Farms Using FLIR Thermal Imaging Cameras
Read the Story -
 Deep Learning
Comparing Deep Learning Cameras with Smart Cameras
Read the Story